Originally when we were 'dreaming' about making the move to France we thought we might have a lot of animals. Hubby always wanted a cow, I like the idea of sheep and/or goats but always fancied chickens. I liked the idea of free eggs (which of course... nothing's free...) and we together thought that having chickens would be an interesting endevour. Particularly also for our little one. So after a lot of googling and youtubing and so on, we decided that chickens are probably one of the easier animals to keep. So we started thinking about...
What chickens to get
There are so many species of chickens, so it was quite difficult to decide what to go for. But very quickly we realised that we will be limited to what's available in our region. When the descision to move to France was finally made, I started looking at the chickens we can get locally. For some reason, YouTube in particular, kept showing me these American channels, so clearly loads of those chickens were not available here.
In the end I googled "where to buy chickens" and tried postcodes or areas nearby. Amazingly, we have a gardening centre nearby that also sells animals, they have a pet section (hamster, rats, mice, budgies, snails, turtles, chinchillas, you name it, they have it) but also a section dedicated to chickens. As I figured out, every two weeks a farm sells chickens at this garden centre.
So the first step was contacting them. What they basically do, they take orderes for a specific amount of chickens, standard local chicken breeds, and then drop them off every two weeks and the gardening centre keeps them in a chicken coop in the store.
In the meantime I also found a local farm that sells chickens and they have been utterly helpful, particularly as the lady who sold the chickens was an enthusiast, so she answered plenty of questions
After watching all these Youtube videos, my main concern was that there are lots of roosters who can get aggravated very easily and attack. Having a small child, this worried me a bit. The lady highly recommended "Legbar" chickens as they seem kind and easy to deal with and there was a bonus: they lay blue eggs. Now I was intruiged.
Funny enough, this breed was apparently created in Cambridge, so we basically decided to move from the UK to France and have British chickens. Soft Brexit... haha!
Where to put the chickens
The next issue at hand was: where could we put them? My husband was very annoyed about them smelling too much, so he didn't want them near the window. Also, that particular stretch is rather flat, compared to the other land around our house. My aunt still uses that for her day-to-day gardening. We didn't want to use that.
However, our house comes with a lot of garden; my grandfather was a beekeeper and further down the hill there is a little concrete socket, where he used to keep his beehives. Now that sounded like an opportunity one wouldn't want to miss.
Of course, now that we live here, reality hit. When we arrived here, we quickly noticed that everything was overgrown. Which makes sense, my aunt is 86 years old, she can't possibly keep everything neat and pretty. Also the most of the garden is on a steep slope, difficult for most people to walk there even on a good day when it is maintained. But we also realised, that the area for the beehives was not as flat as we thought it would be and on top of that, it was also one of the areas the furthest away from the house. So particularly in winter, it would not be very pleasent or safe to walk down the garden.
In the end my aunt decided she can't maintain most of the garden anymore anyway, so she happily would give some up so we can put the chickens on.
That means, she basically just decided where the chickens would live in future.
Getting the chickens on the property ladder (or rather... ramp)
I had been browsing a lot to find the right home for chickens. When you start browsing the shops, you can mostly tell, even here in rural France, that the coops are mostly made for the general "backyard chickens". So as a little side hobby or for pets, and generally those coops are for 2 or 3 chickens and not more. That included all major DIY shops like BricoMarché, LeroyMerlin and the garden centre Gamm Vert.
However, we already decided to have more, so most solutions were not sufficient. In the end, I found a coop that seemed big enough on BricoMarché (technically it's a third-party seller named VidaXL). So I ordered the coop as I thought it was quite handy. It had two flaps on the side to open to get the eggs out easily. The bottom has a drawer that can be pulled out and cleaned easily.
Now I had to find something to let the chickens out of the coop and still be protected from predators. In the end, I went with a metal cage with door, big enough so I can stand upright in the cage when cleaning. So I went with this one.
The Coop | Housing
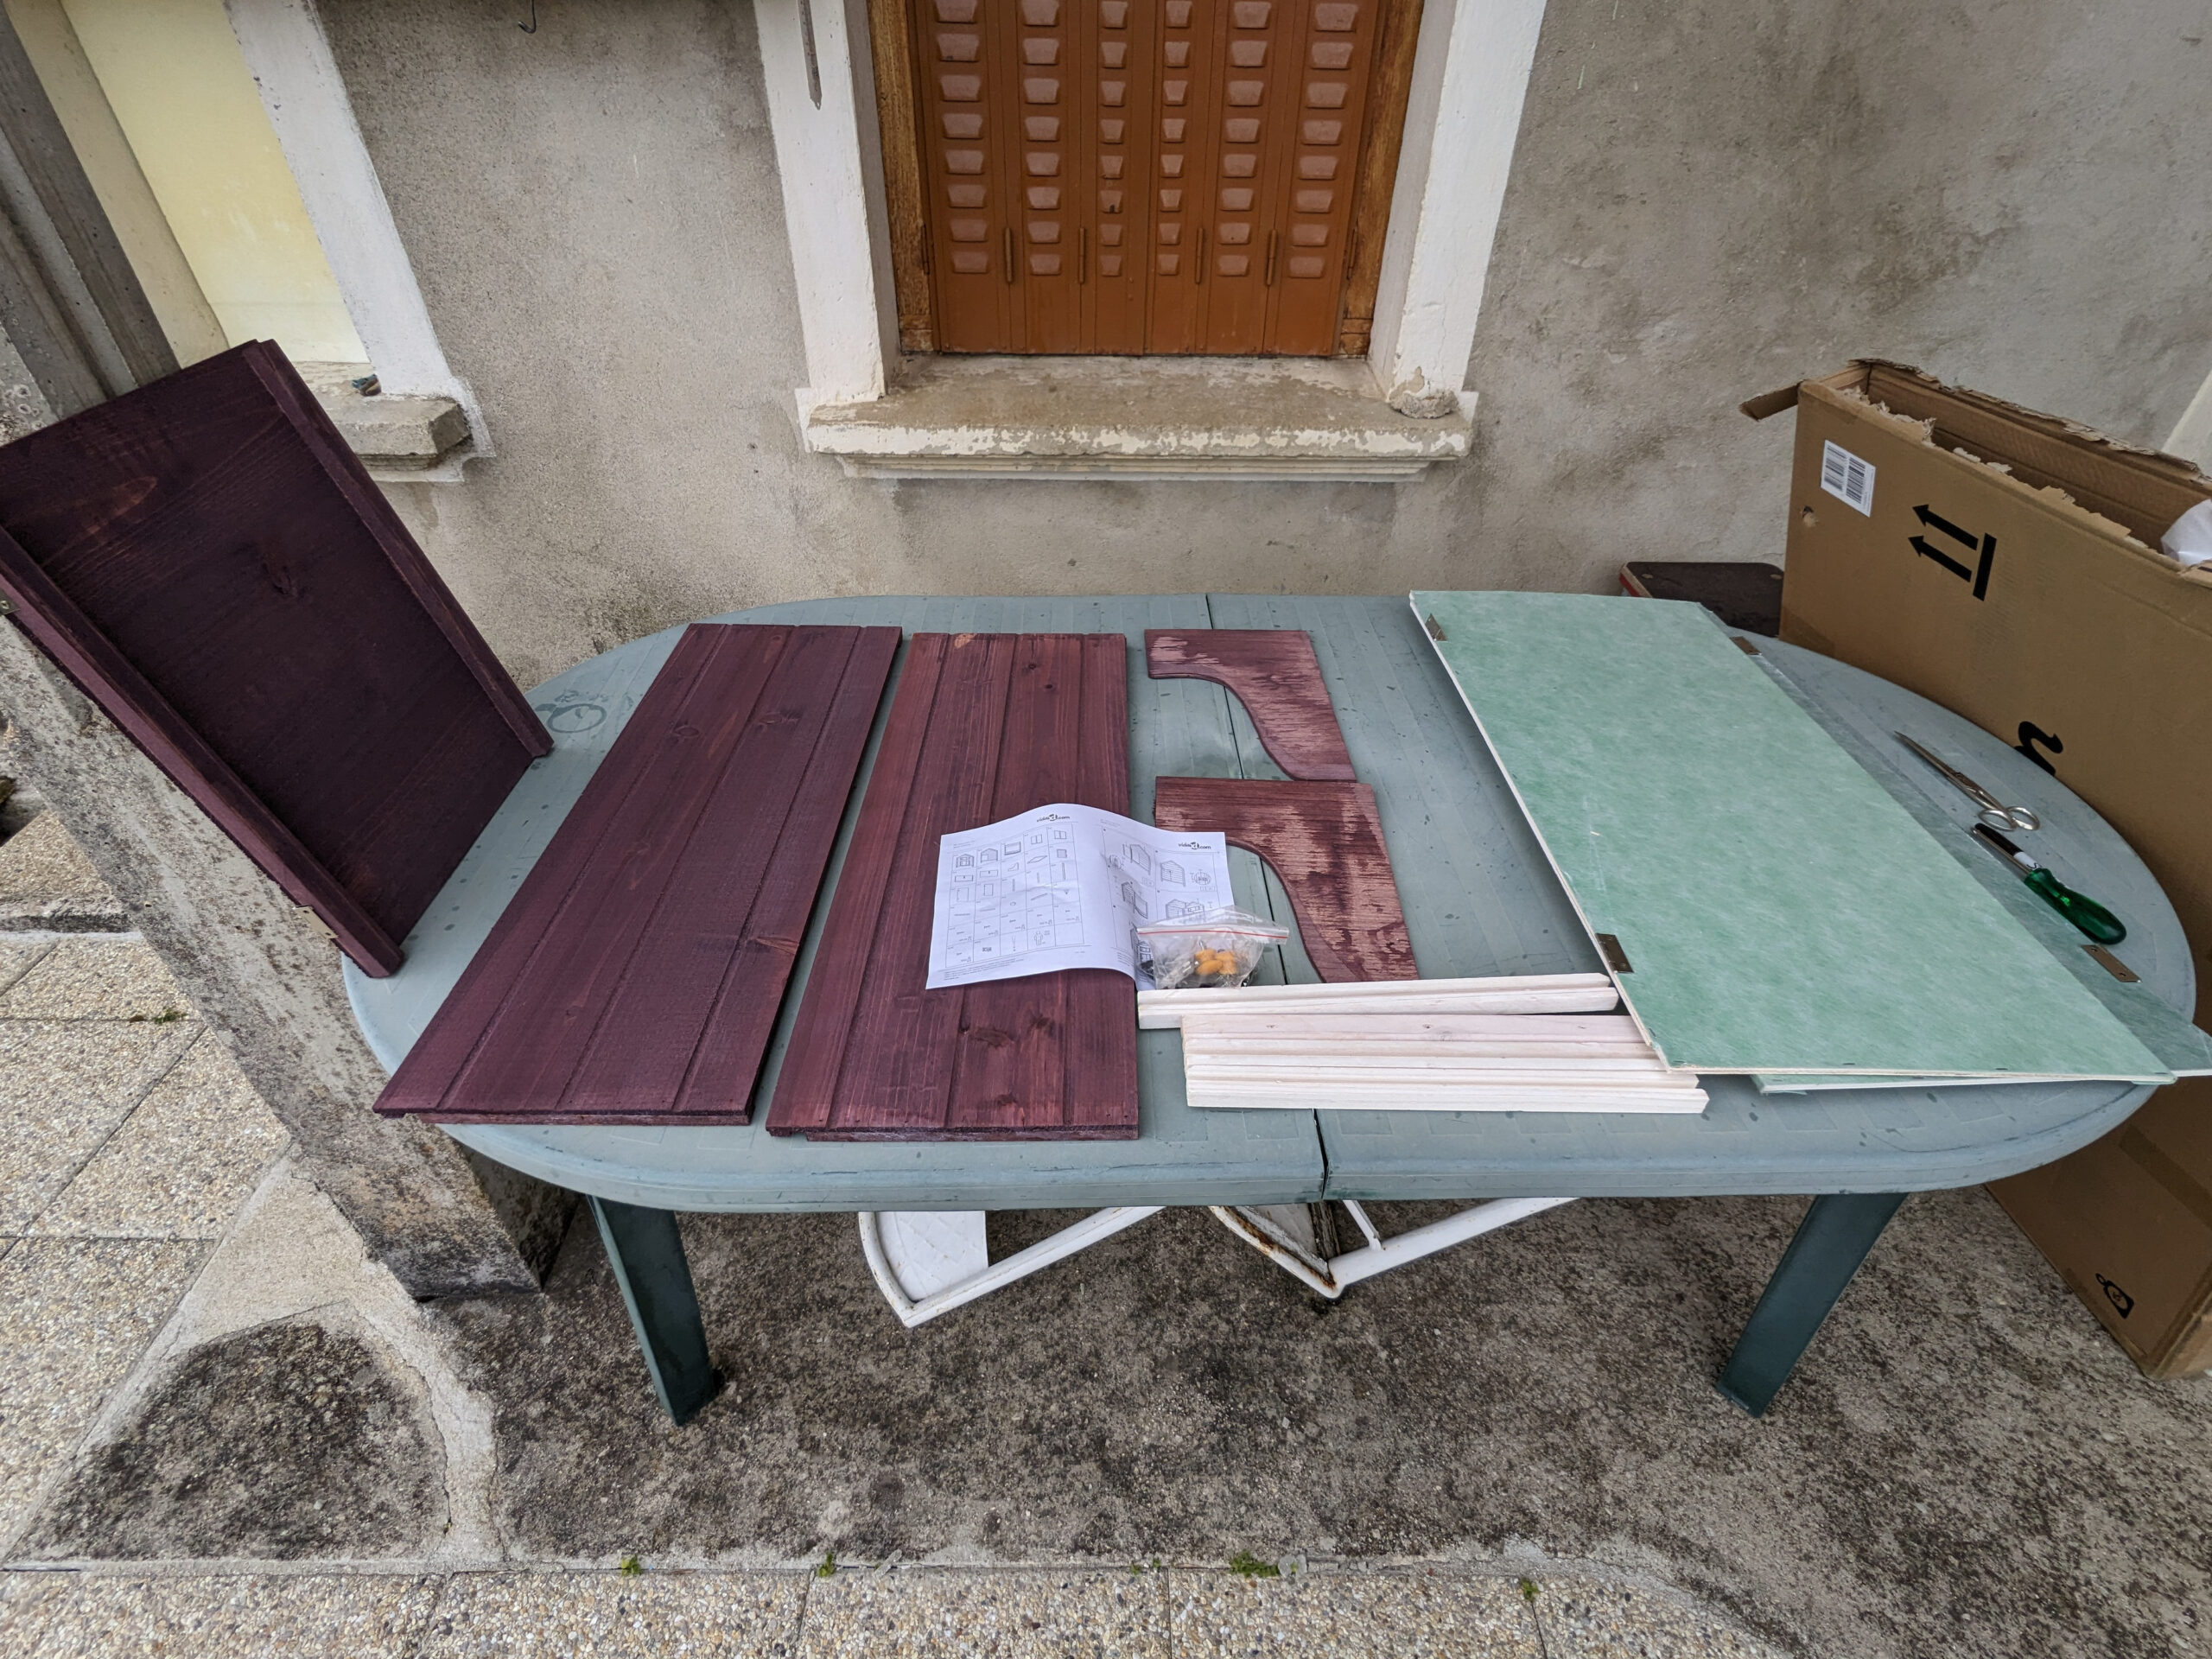
Unpacking the wooden chicken coop, I have to say I was very disappointed. The coop back then cost a 190€ and the first impression of the quality was very poor to the point I was worried that it will not survive a wet day.
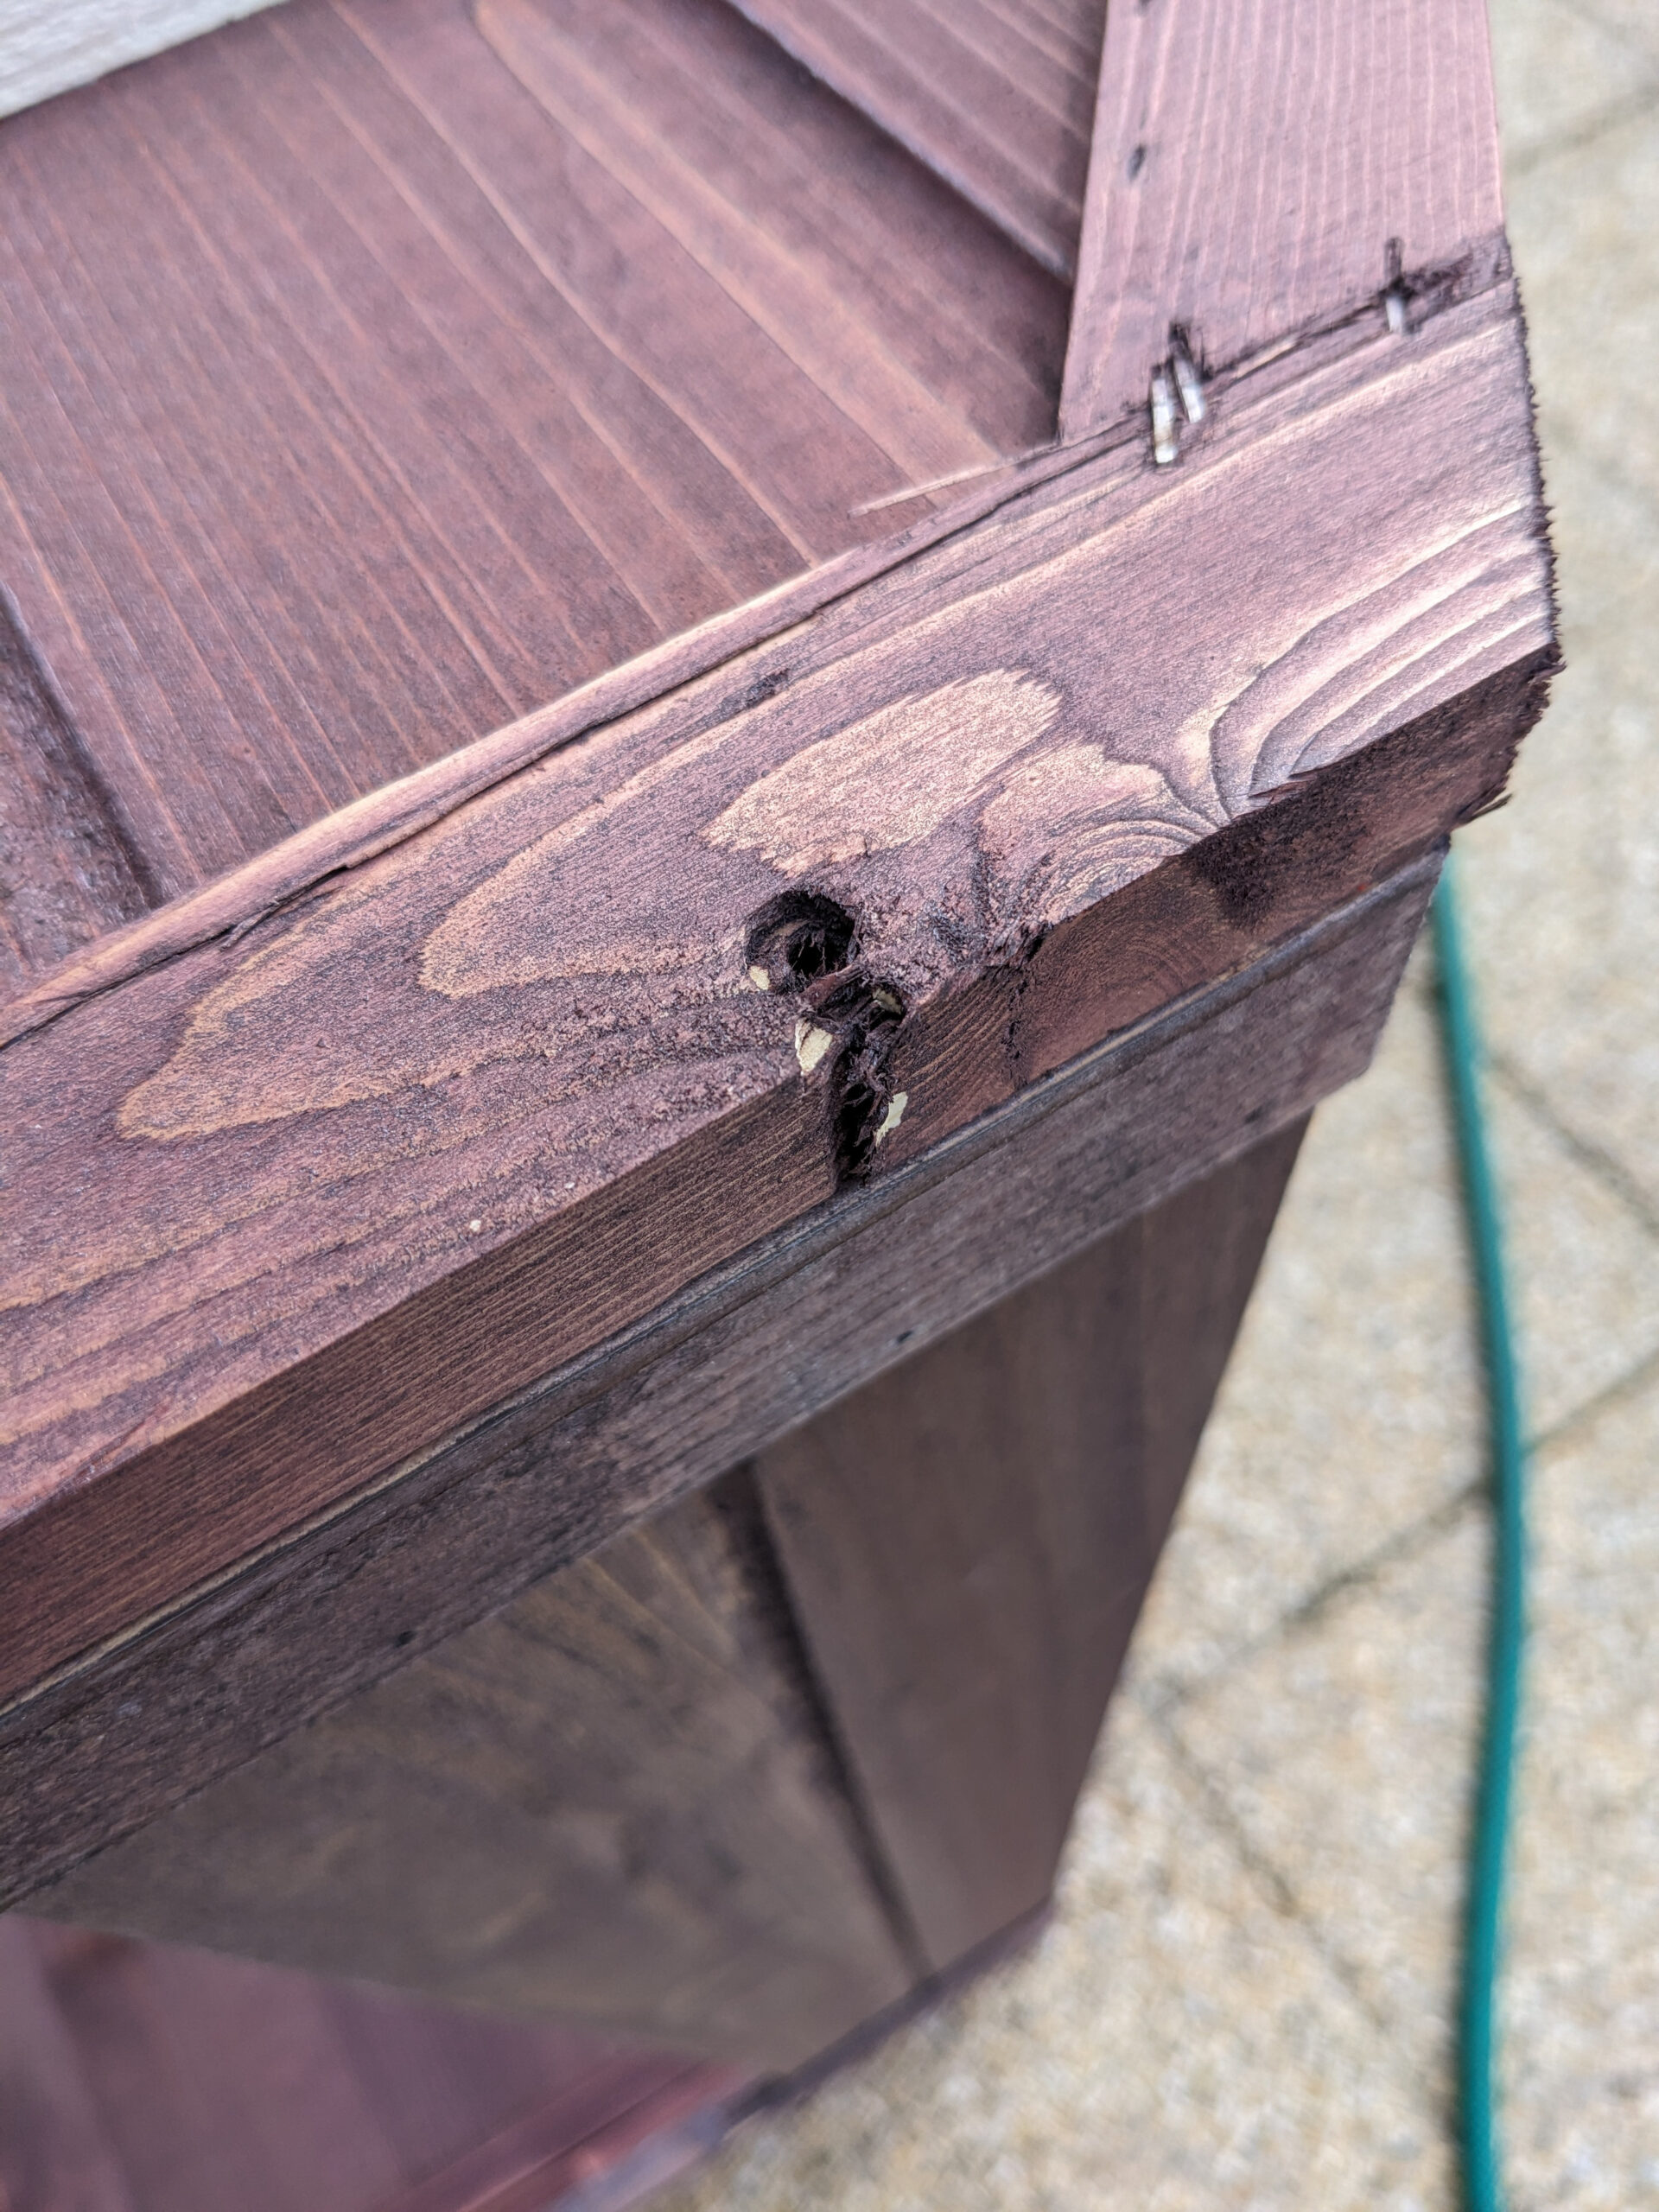
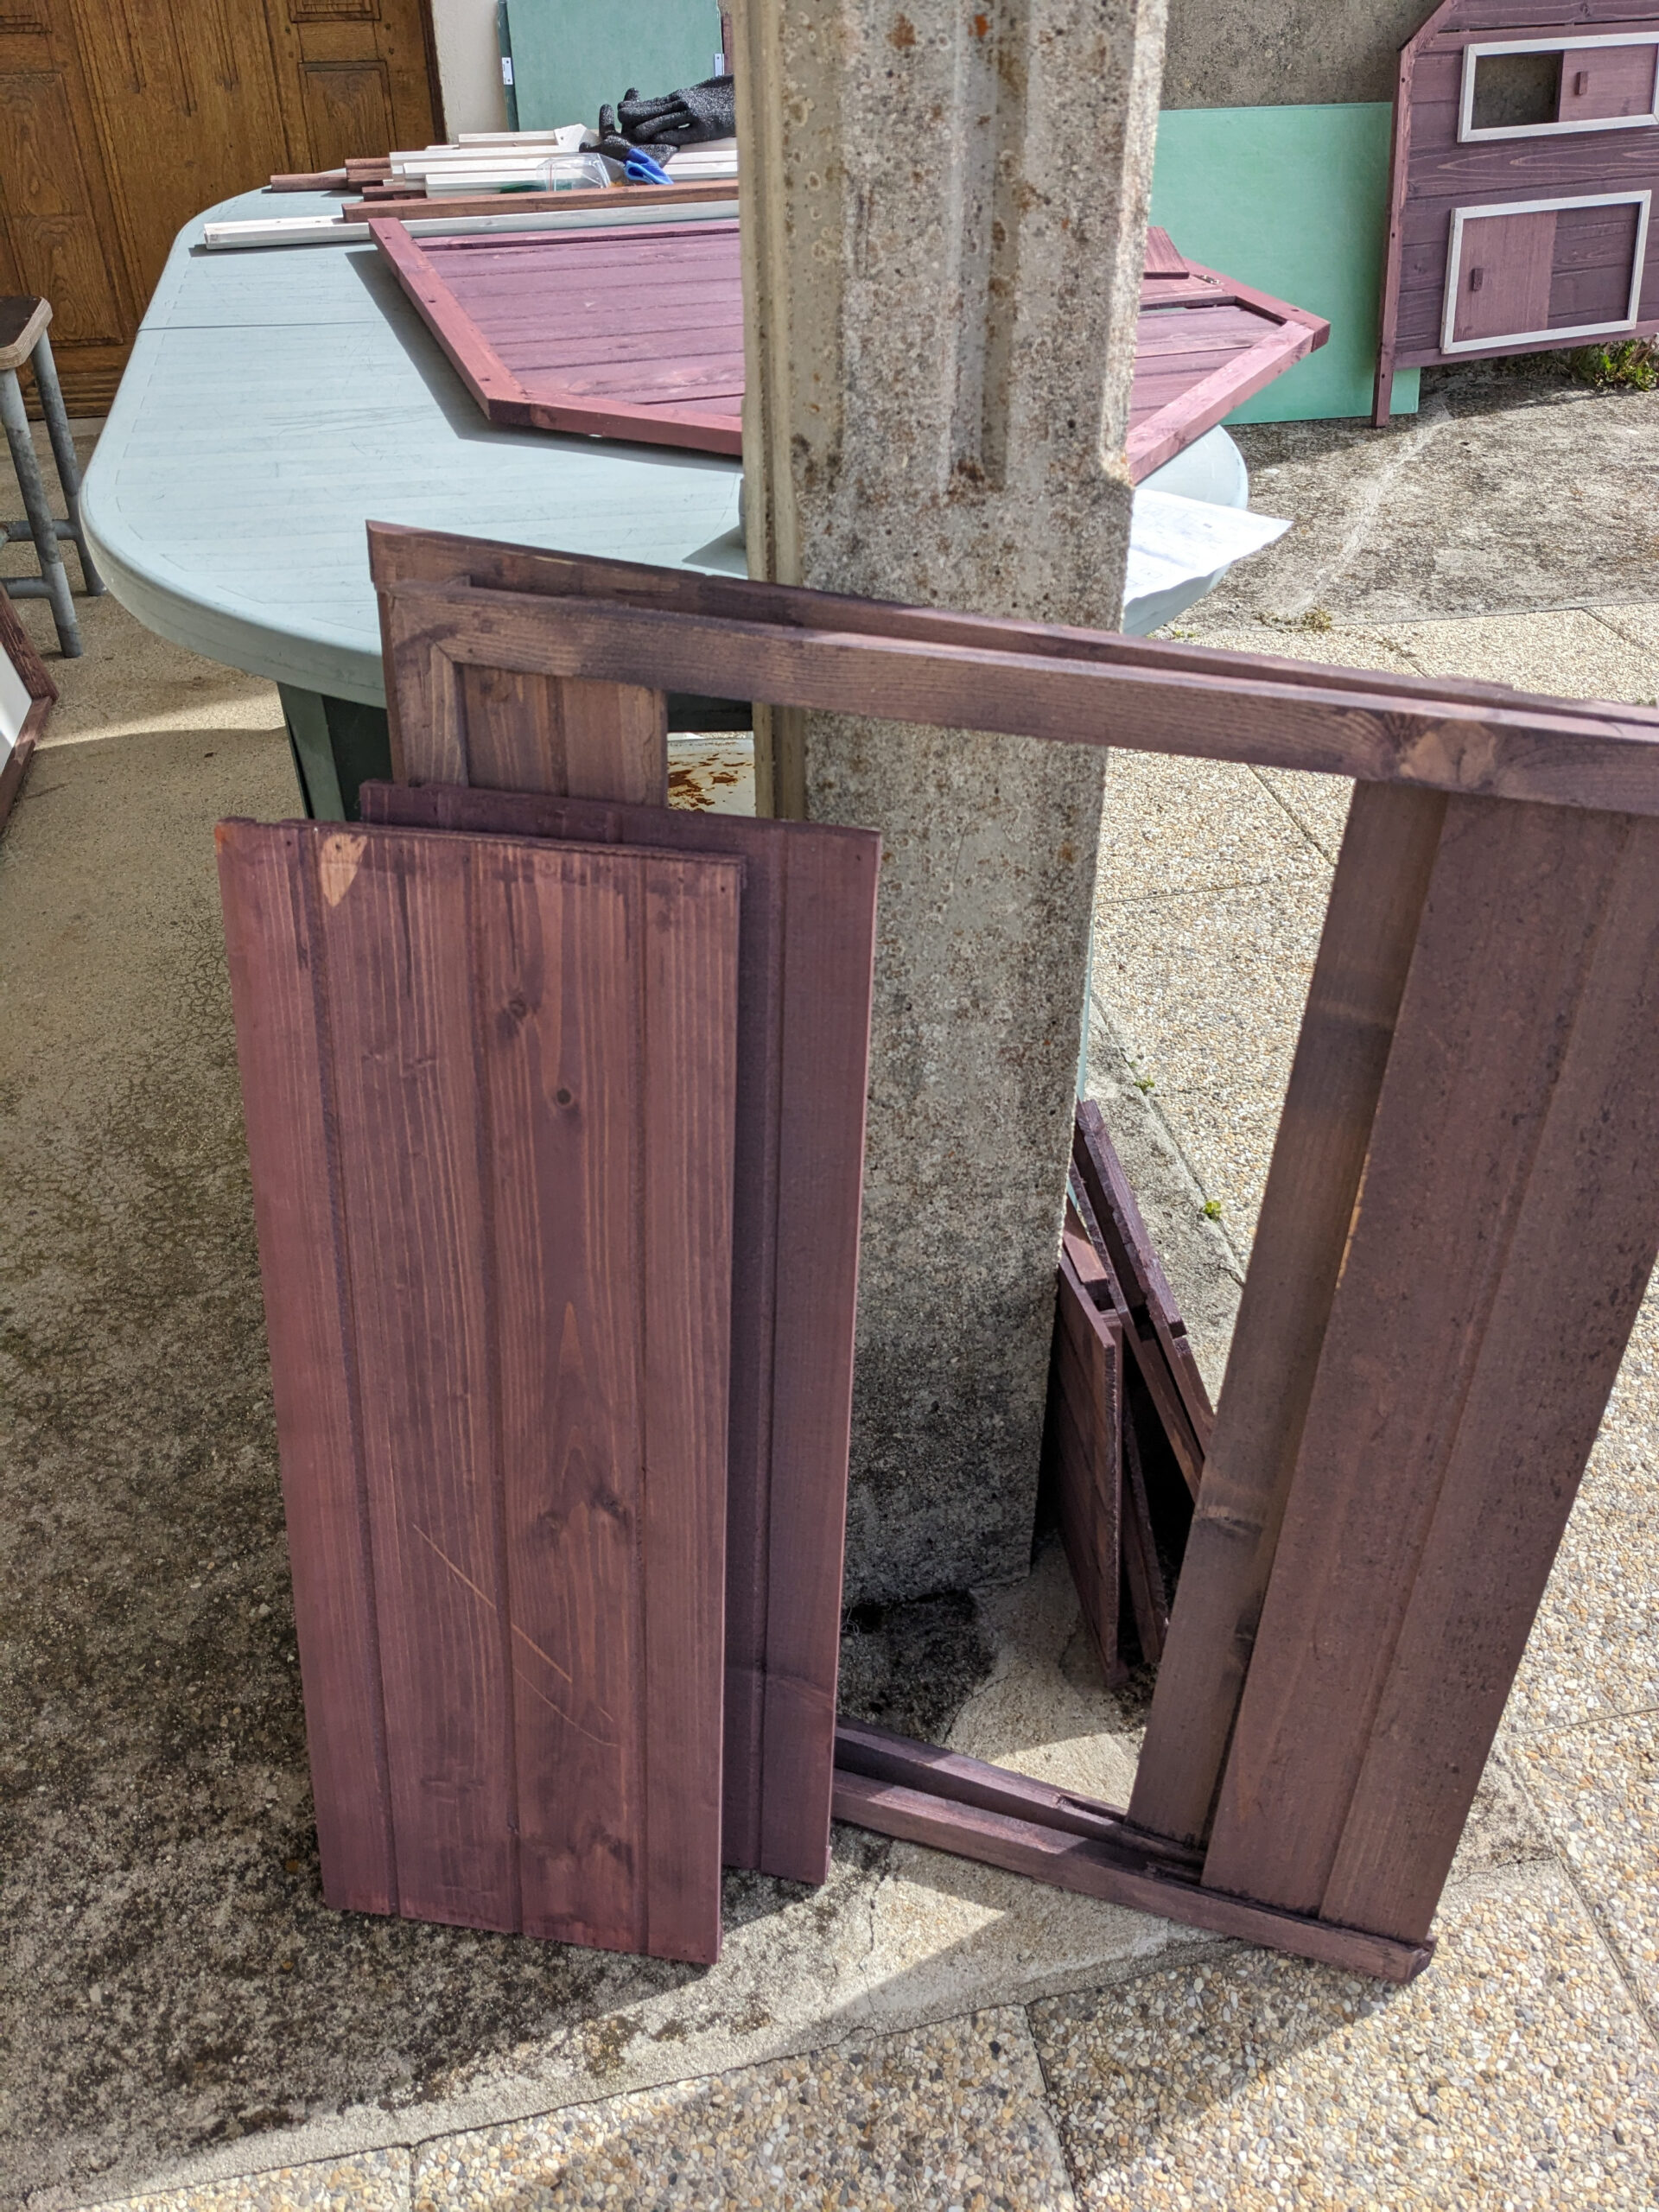
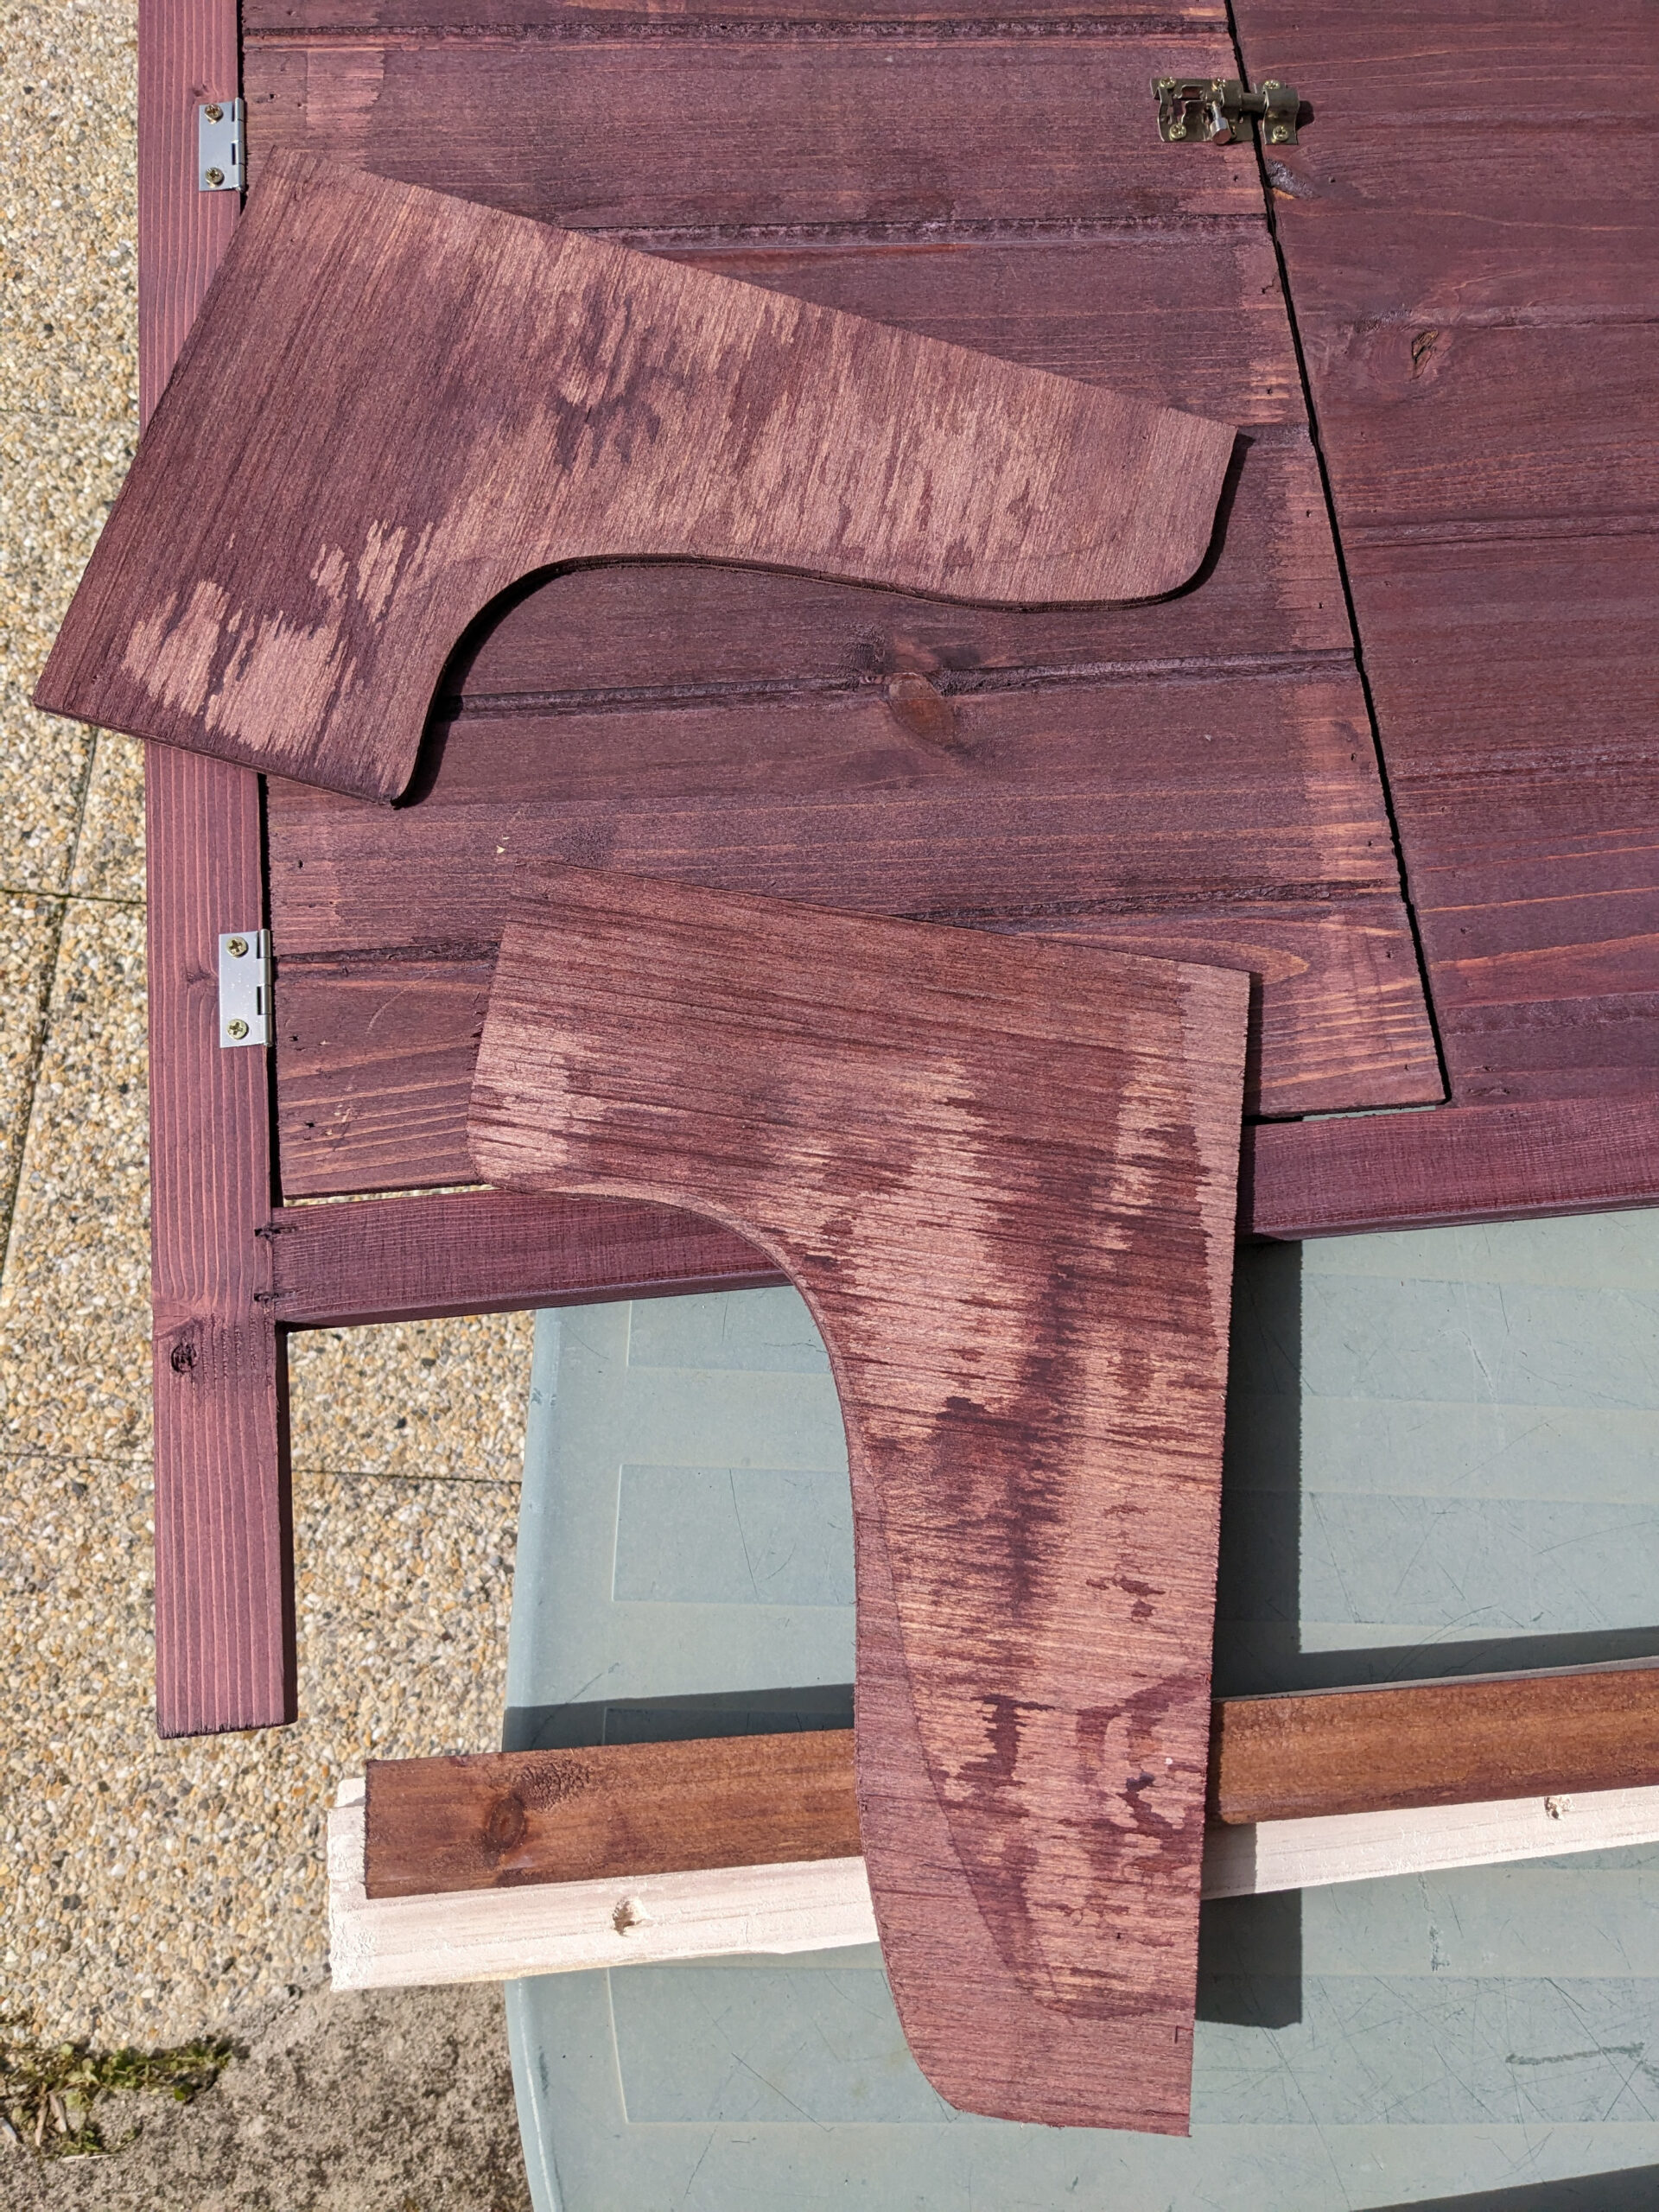
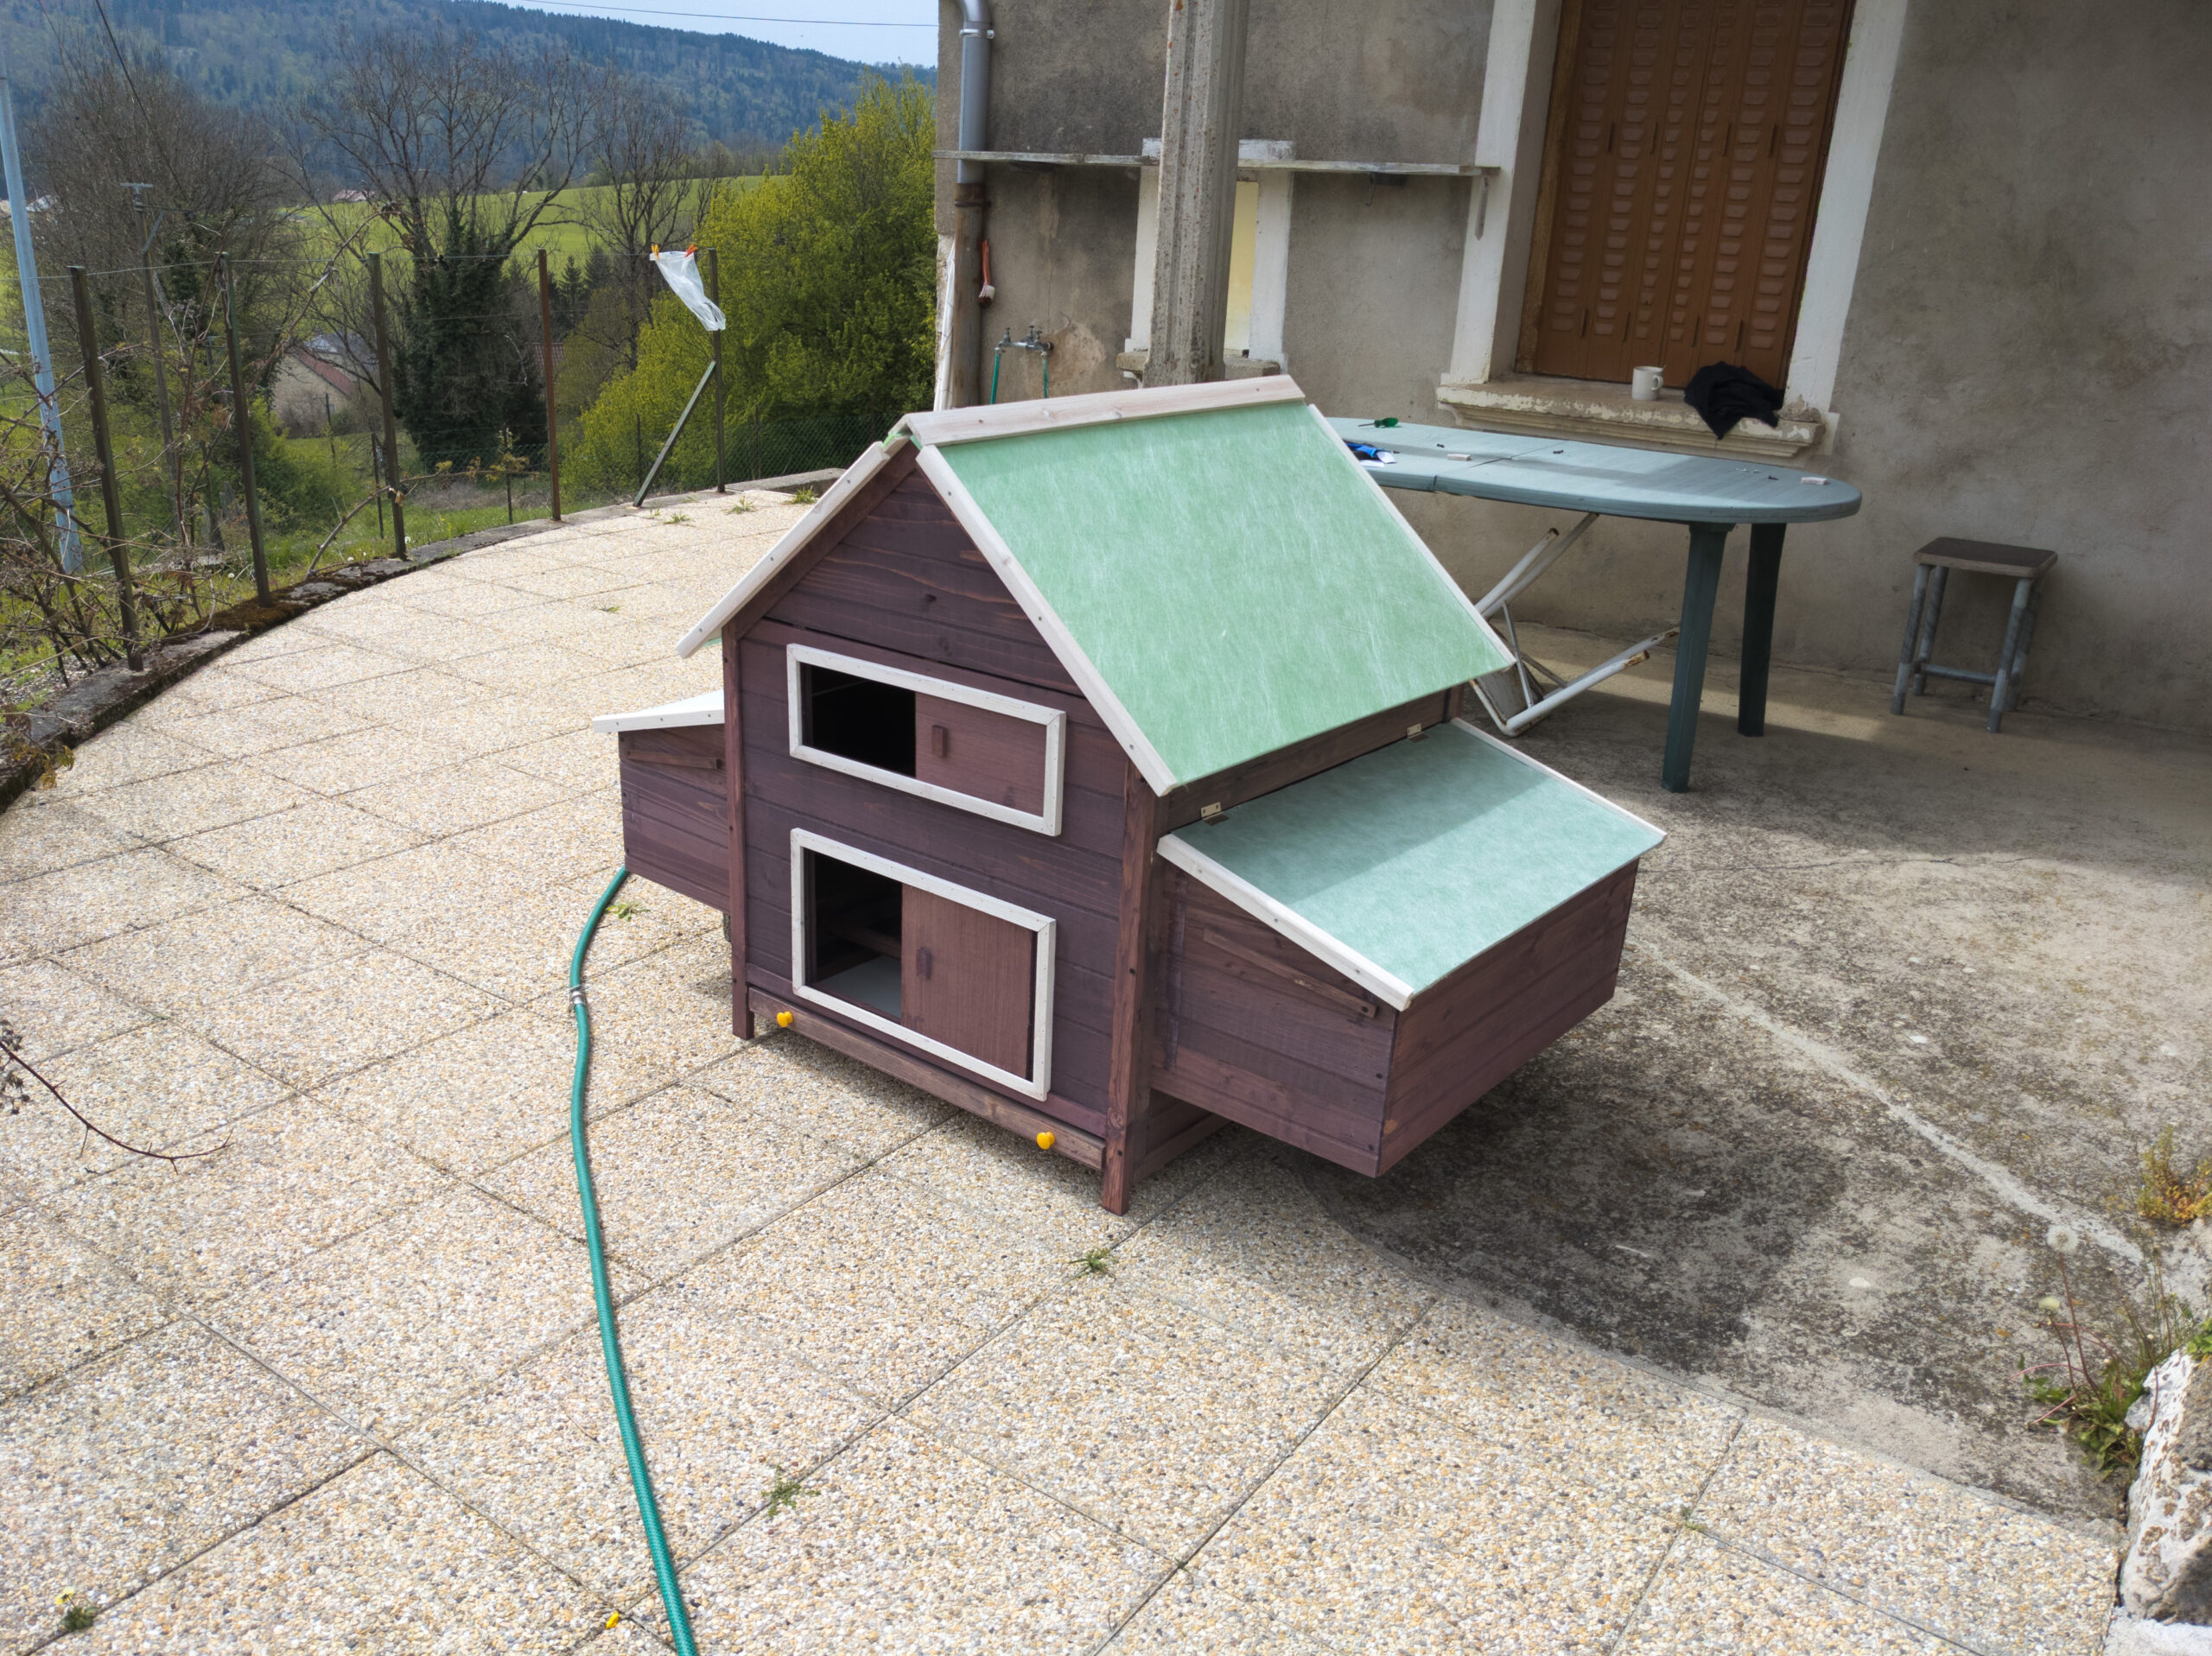
As you can see in the three pictures, the paint job in general is quite awful. The paint has been applied so thinly it will not protect the wood from moisture whatsoever. There are pre-drilled screw holes that have been made in error, so another hole was placed right next to it. So whether I put a screw in or not, wouldn't make a difference, as it simply won't hold. The wood pieces had scratches all over and the inside paint job was even worse than the outside. Some areas looked like someone just quickly spilled a bucket of paint over it. The colour is also not quite what was advertised. The wood looked thin and wonky in places. In short: for half the price I would have expected something like that. But not for a 190€. Nowadays, this coop costs 230€, I have no idea how they justify this, to be quite honest.
The instructions were more or less well explained. However, it came with a lot of different screws and often it was quite difficult to figure out, which screw to use. Some of the (wireframe) images also were so difficult to make out, that it was difficult to understand from what angle or side the image was supposed to be seen (or the coop for that matter).
Before I started building, I decided to paint the coop again myself, to make sure it will survive a rainy day. So I popped into the local DIY shop and got some outdoor paint. It was a similar brown with a red tint that I thought would look rather nice in the garden. When I painted the coop it started to look very purple which worried me a bit. But once it dried it had a lovely colour.
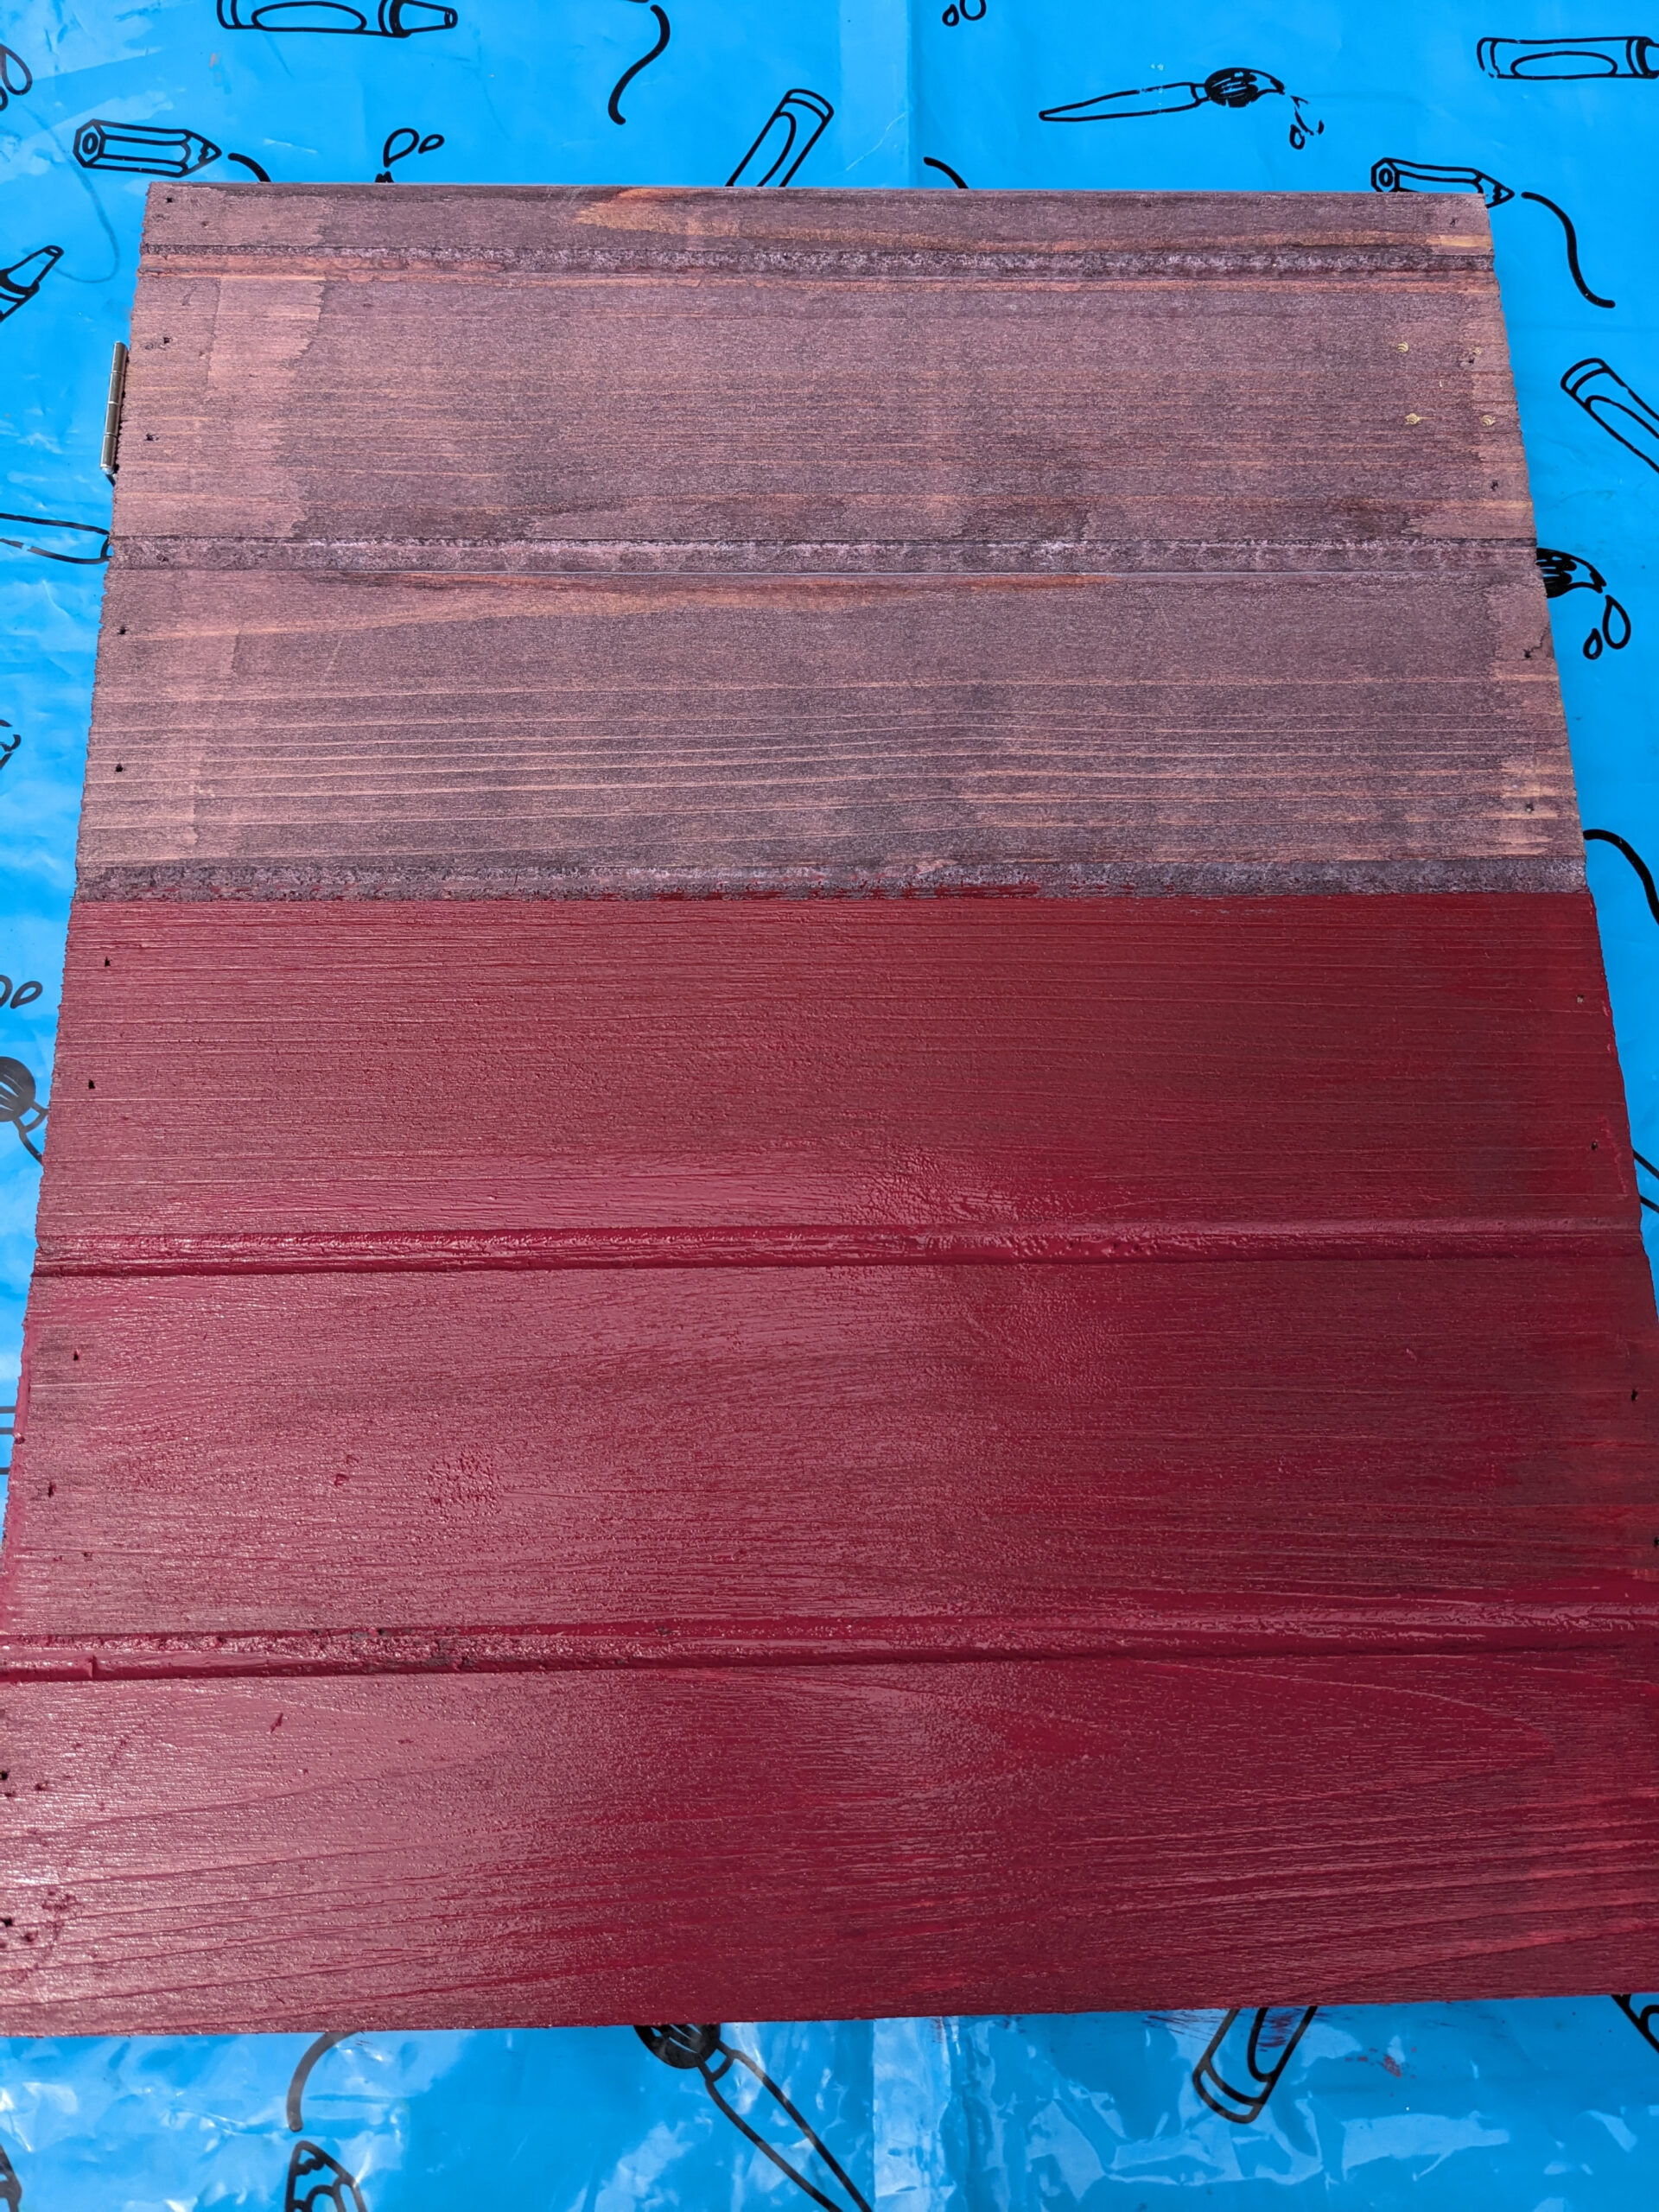
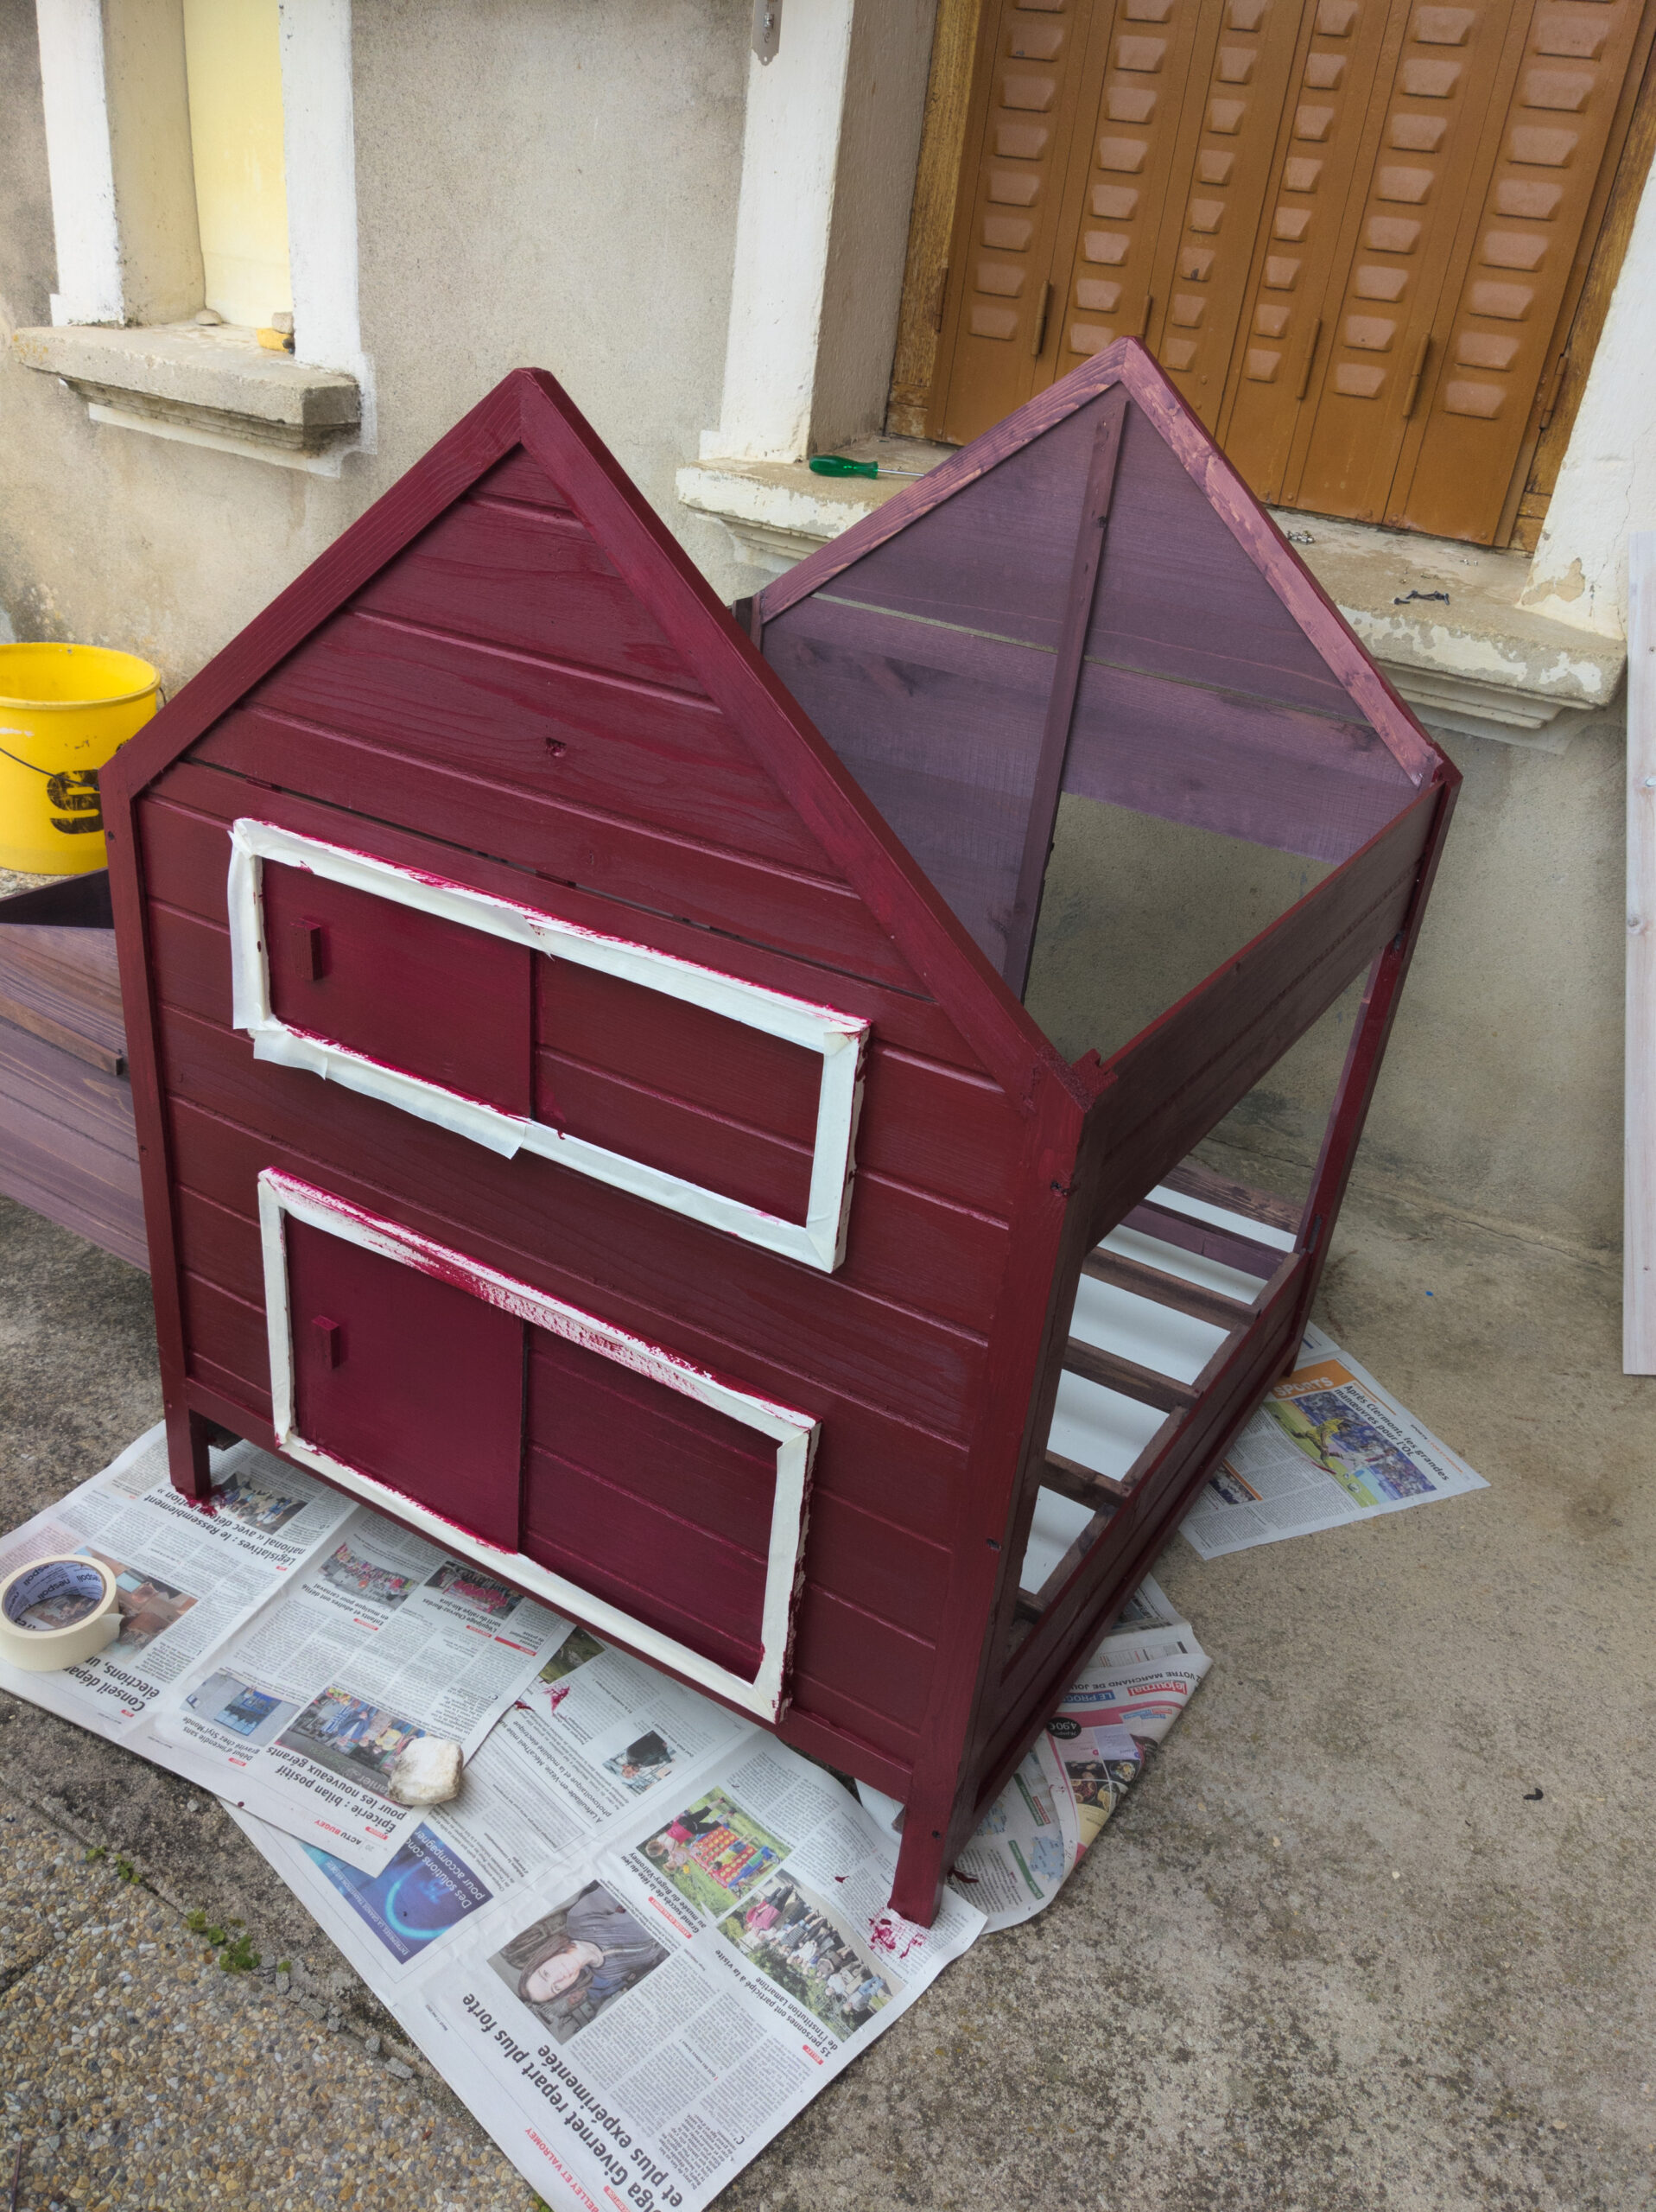
In the photos above you can tell the difference. Also once I was done, it was hard to make out the wood texture underneath, so I do hope it will do what it is supposed to do: protect against the rain.
In general it was great fun to build, and very exciting, even though a bit frustating at times. Luckily it wasn't raining during the days as I painted outside (no space in the workshop, it still has all the furniture in it).
It is also advertised that the roof is protected by some sort of plastic sheet. I've seen this before, it's basically the same thing you put as a bag over your plants in winter, so they are protected. Hardly weatherproof. I didn't trust it at all. Luckily I still had some plastic sheeting that we used to cover our garden furniture with back in London. We also used it as a cover for when we were painting the walls. So I cut some pieces off and stapled them on top of the roof.
The Coop | Cage
This was the bit that worried me a bit as it seemed bigger than I thought. But when built it was actually smaller than I thought. However, the problem was merely that as a general outside space for the chickens it would have been sufficient, but clearly because we put the wooden coop in there, we'd also loose quite a bit of space.
Anyway, when i started taking the bits out and screwing it all together, I noticed that the garden was not quite as flat as I hoped it would be and the cage got bigger and bigger. Once the metal framing was up I noticed that we need to do some garden work as well in order to provide a flatter area for it all to go.
Instructions were clear and easy to deal with. The only difficulty I had was that some of the structural pipes had holes in them that were not clearly indicated in the plan. So a couple of times I used the wrong pipe and didn't get any further of building the cage until I realised why.
The very difficult (or rather lengthy) bit of it, was getting the fencing and wire attached to the framework. I think alltogether it took me over a week. It started off easily, particularly on the sides, but it also added some frustration as you have to clip the big wire roll (and I only had a tiny clipper, that was rather annoying) and then put a "wire thread" around the framework and the wire. The wire was rolled up, so whenever I tried pulling it through it made a knot, so you had a metal wire not that is impossible to untangle. You either leave it in or you cut, attach, start again. Needless to say that the reason it took me so long, was the frustration and the fact that I decided I needed to do something else before I chuck it out of the imaginary window. 😉
By the time I got to the roof I decided to use plastic cable ties (and I hate using plastic!!).
I was very pleased with the end result, but I still had to cut off all the plastic ends to make it look a bit more pleasant. Also of advantage: it came with a plastic cover half the size of the cage. So half of the cage can be dry during rainy days.
The Coop | Landscaping
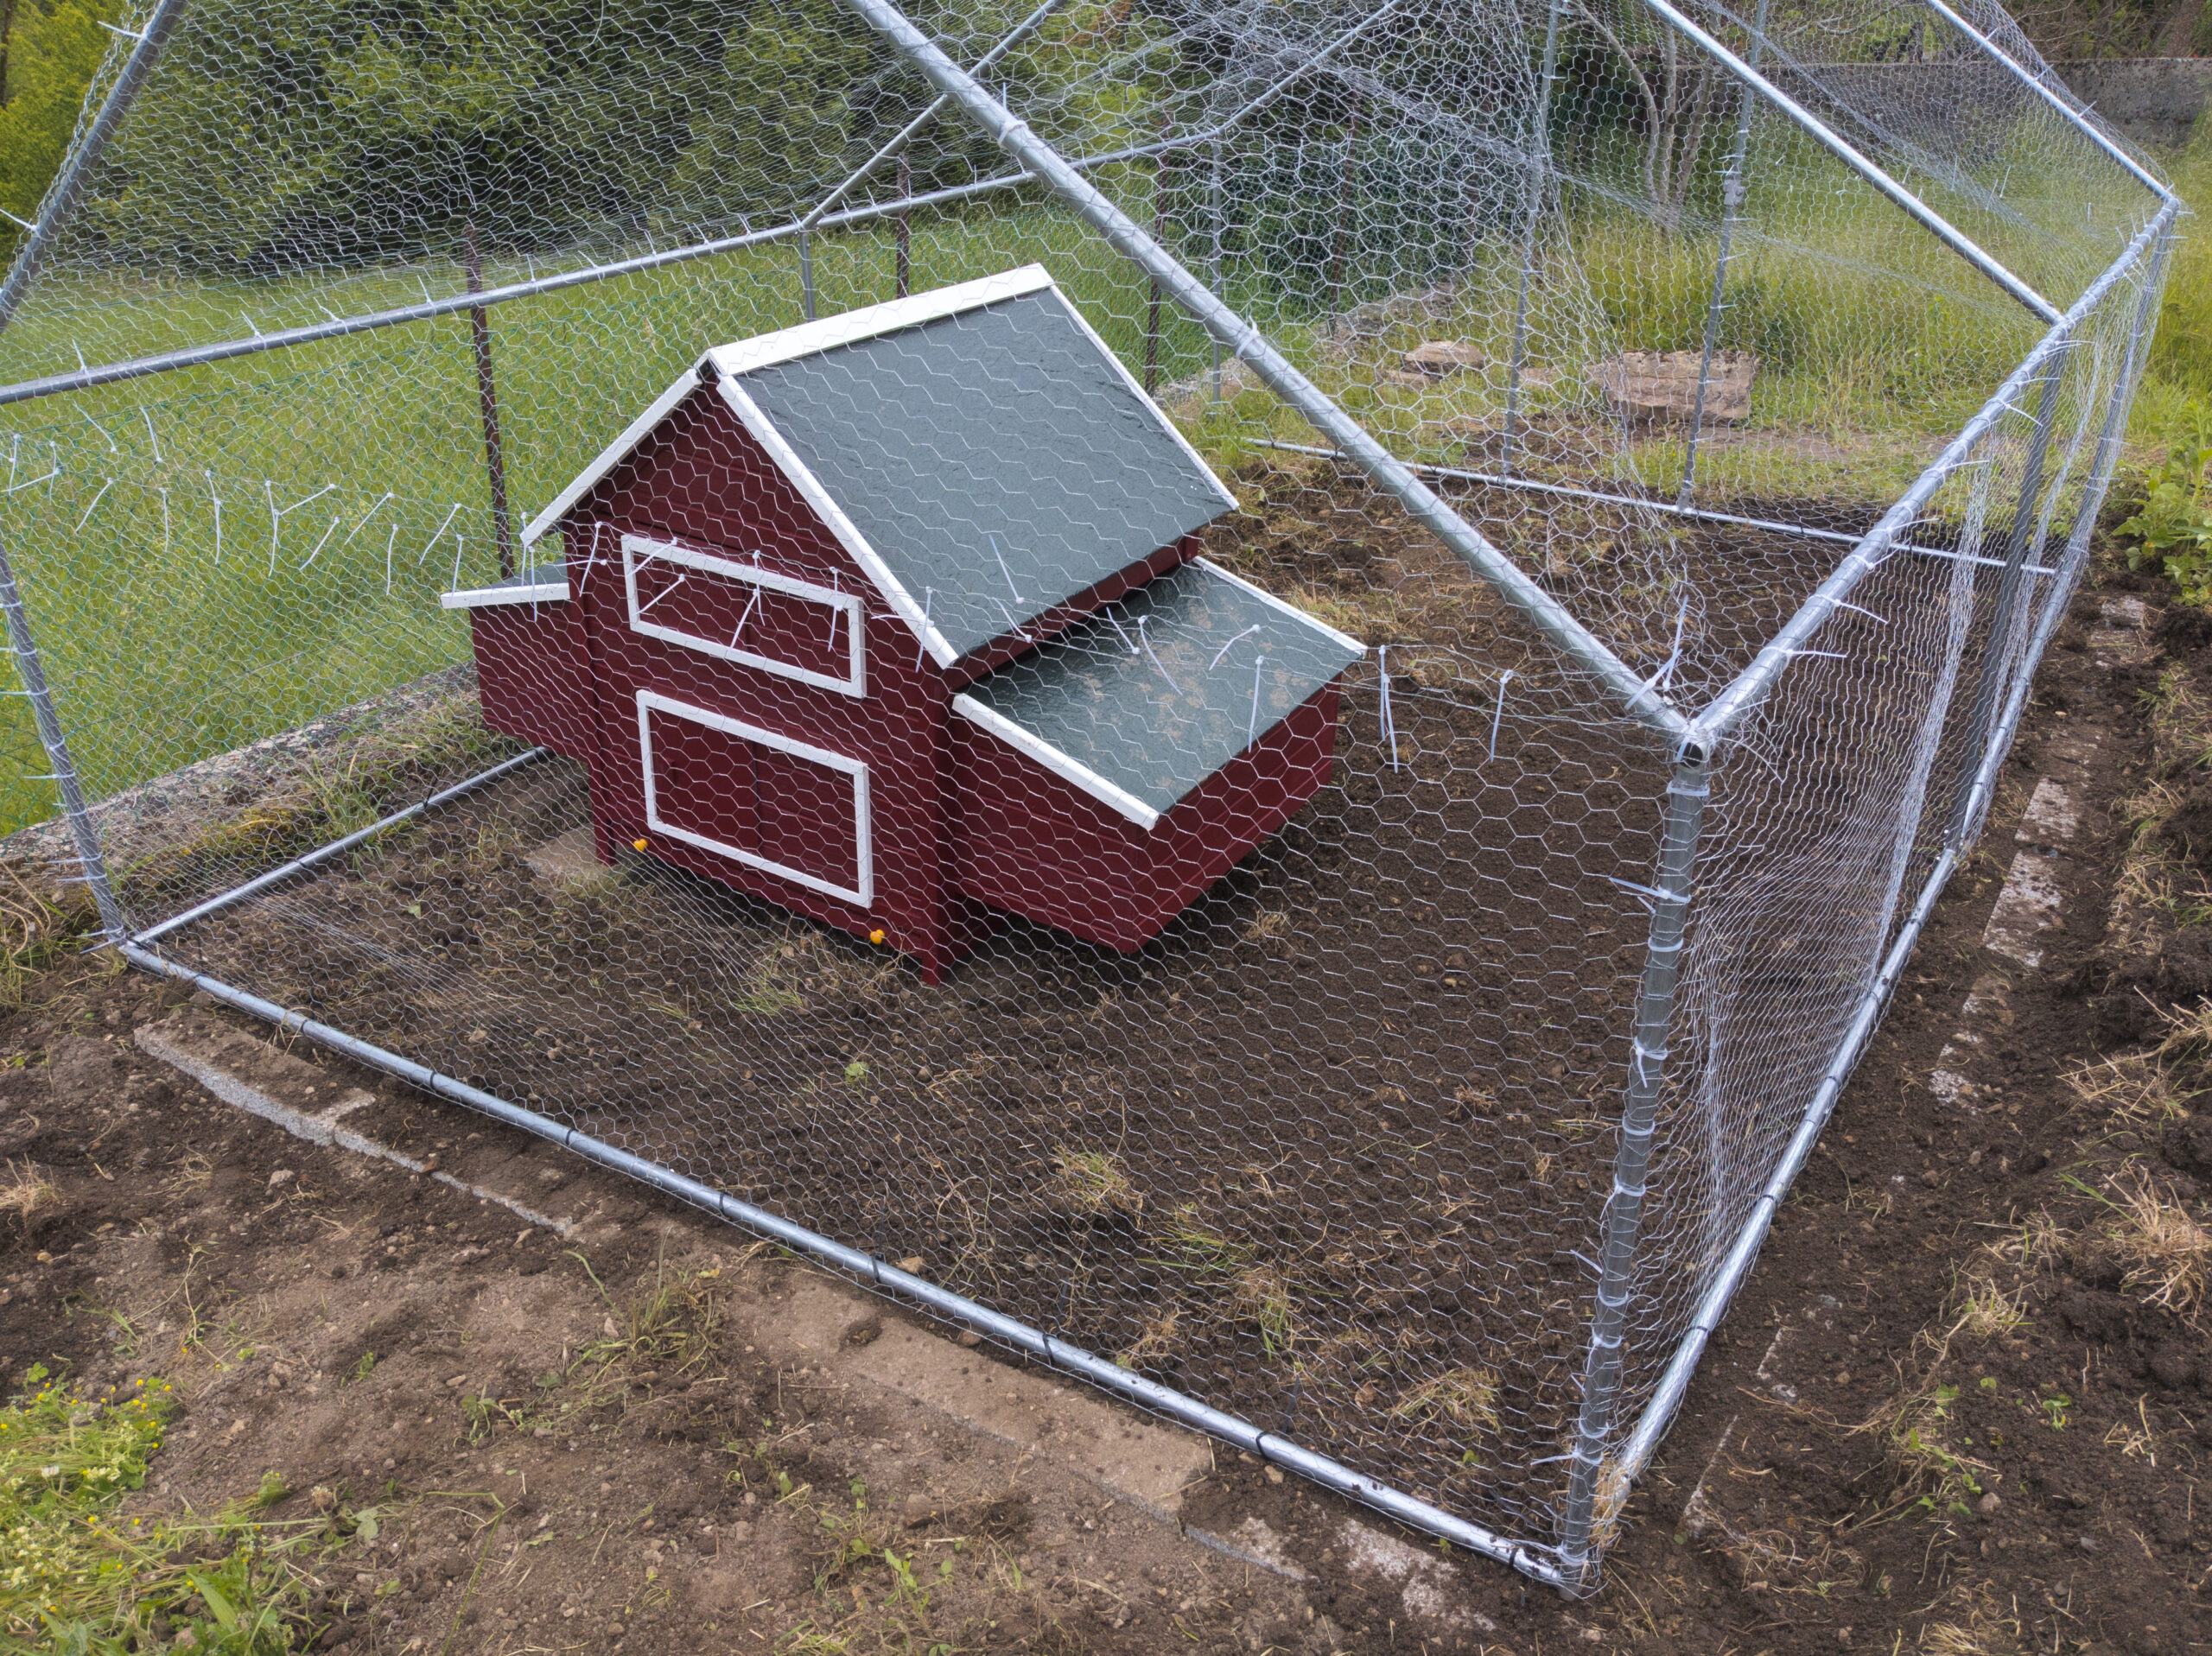
As I mentioned before, and you can see it in this picture as well, we had to do some extensive landscaping. First of all, the garden wasn't as flat as we wanted to or expected. So we had to flatten the the garden by digging up the soil and moving it around. That also meant we had to stabilise the ground for the wooden coop so it stays leveled. You don't want the chickens to fall over inside as everything is on a slope.
So we dug up two holes where the wooden coop's feet are and we still had loads of concrete blocks that were used to build part of the house. We put those in and put the coop on it.
As there is plenty of wildlife and neighbours had been reporting their chickens being attacked by foxes and stone martens, we decided to take another precaution: we have put more concrete blocks in the ground so foxes and stone martens can not dig under the metal cage.
Disadvantage for the chickens though... there is no greenery anymore for them to eat. But we'll figure something out.
